Mastering the DingData Portal
Follow this guide to set up your account, connect your social platforms, and start automating your content strategy in minutes.
STEP 01Sign In
Access the DingData portal instantly. Sign up for a new account or sign in quickly using your Google account for a seamless experience.
- check_circleOne-click Google Auth
- check_circleSecure SSO Integration
- check_circleInstant Access
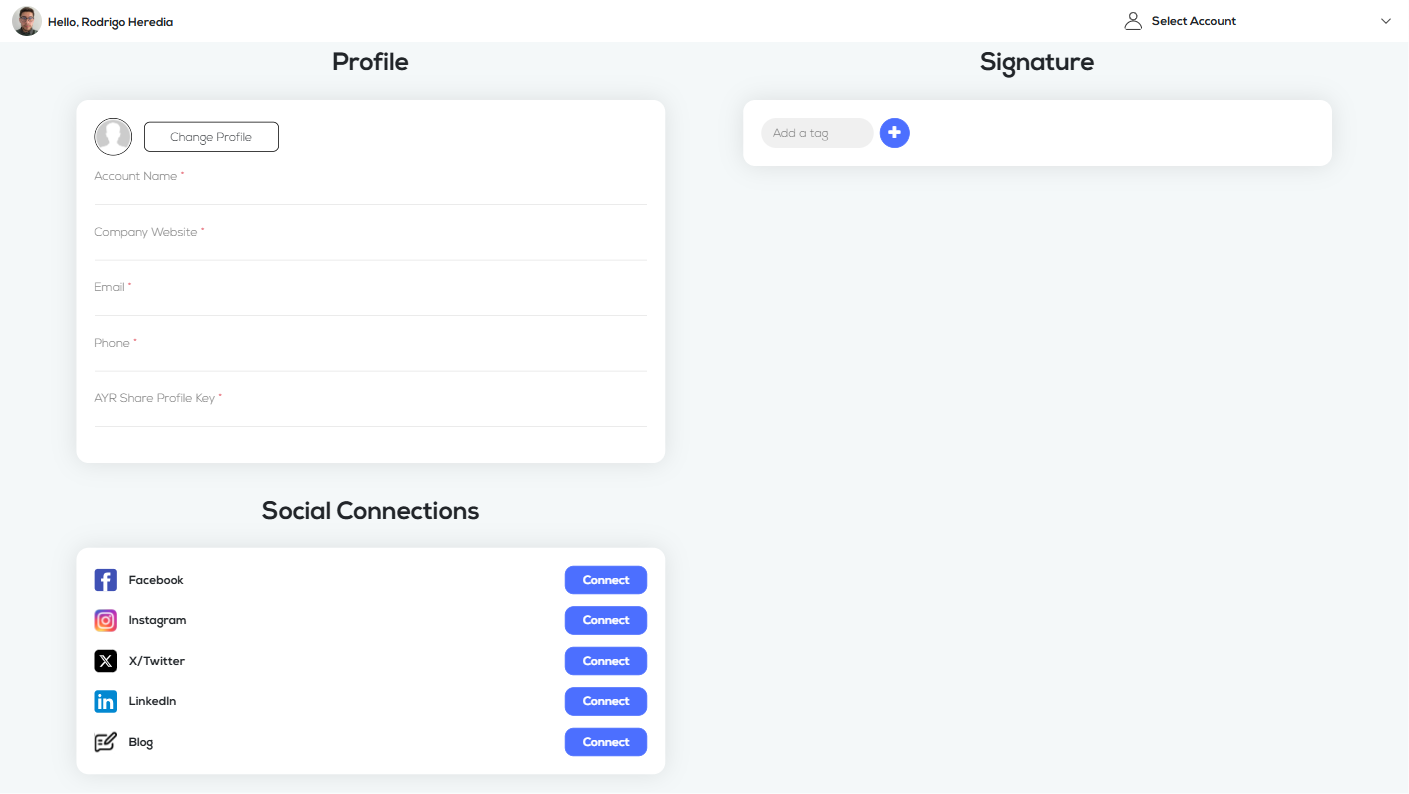
STEP 02Create an Account
Set up your business profile to start managing your presence. We'll need a few details to customize your experience.
- check_circleAccount Name & Company Website
- check_circleContact Info (Email & Phone)
- check_circleAYR Share Profile Key
- check_circleSocial Connections & Signatures
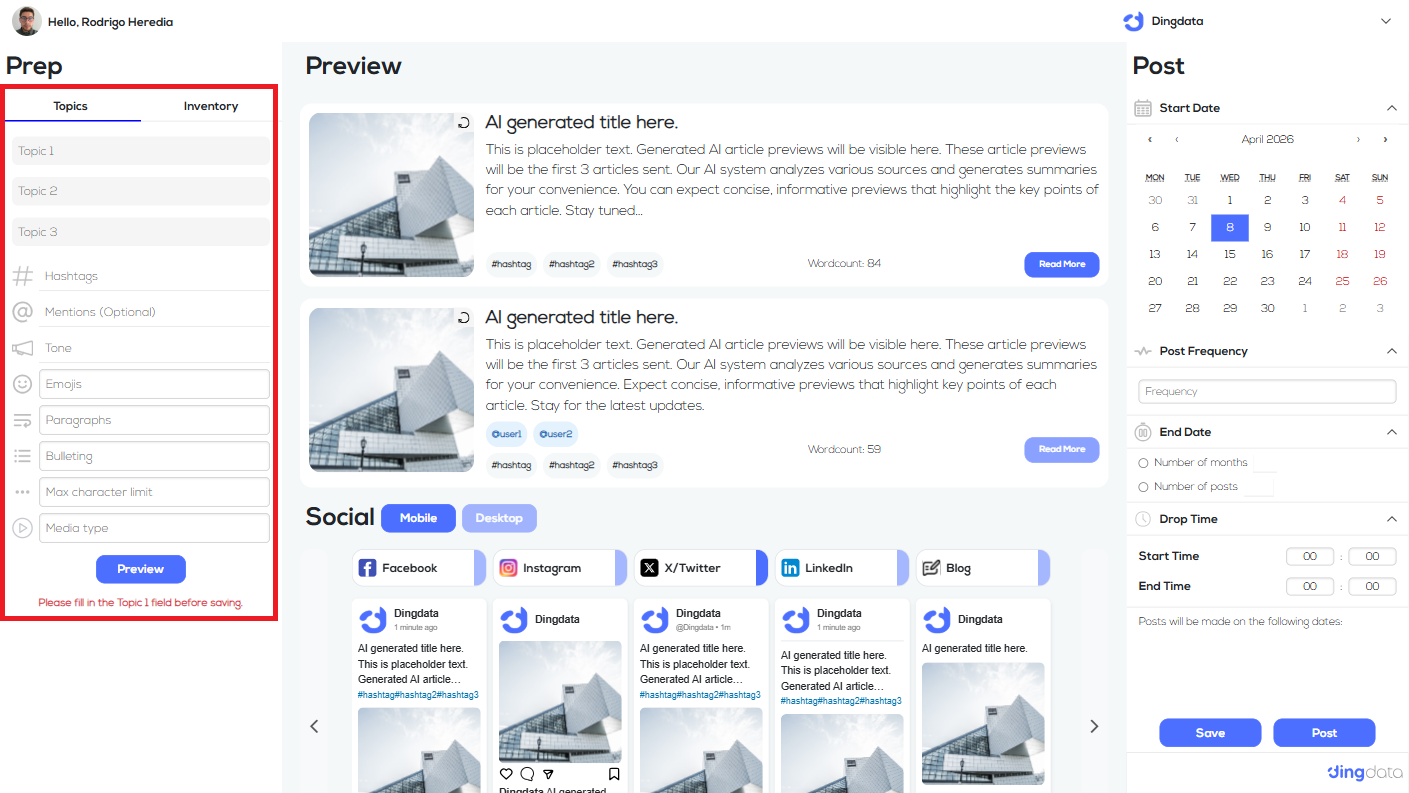
STEP 03How to Create?
Harness the power of AI to generate high-quality content. Our engine handles the research and creative process automatically.
- check_circleAI Topic Research
- check_circleMulti-Model Image Gen
- check_circleVideo Generation
- check_circleBrand Voice Alignment
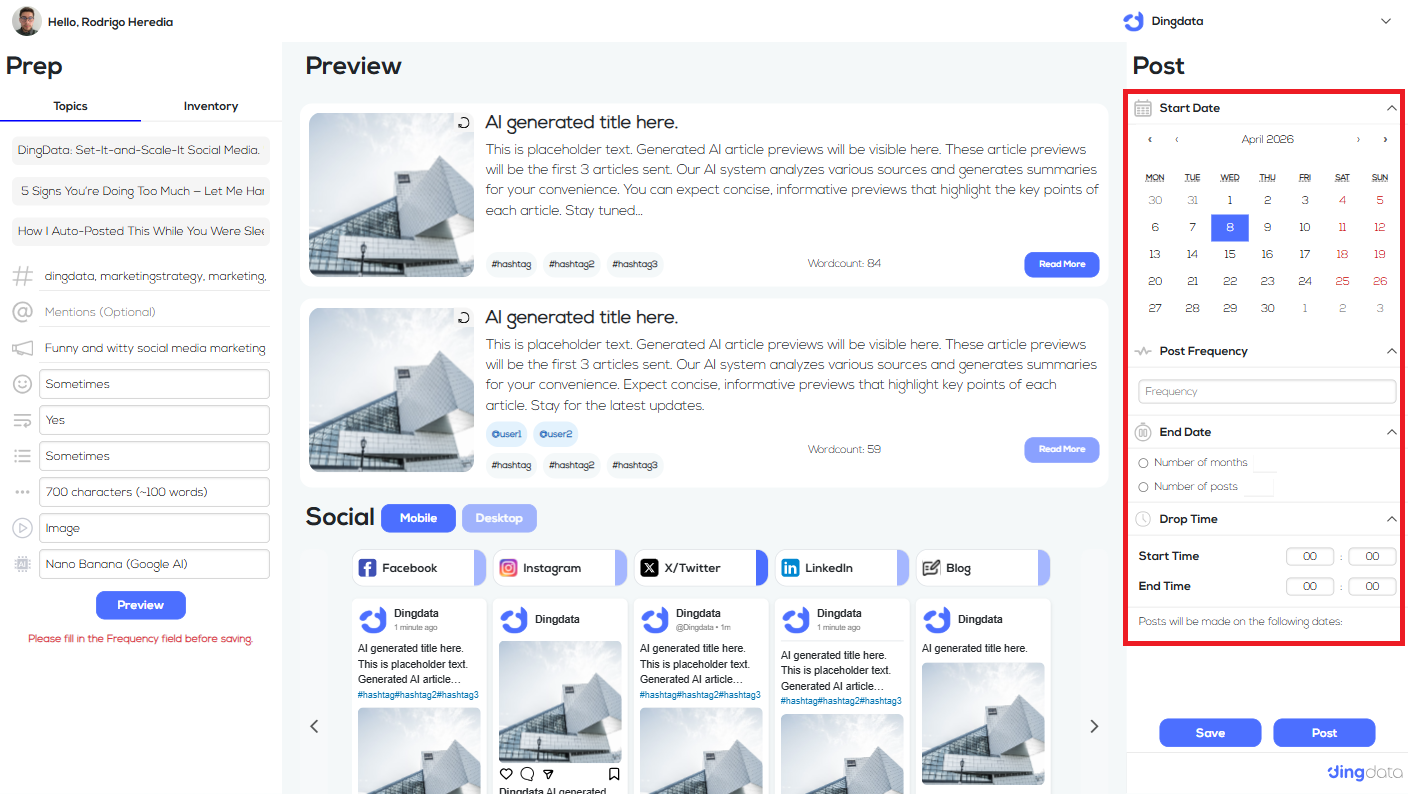
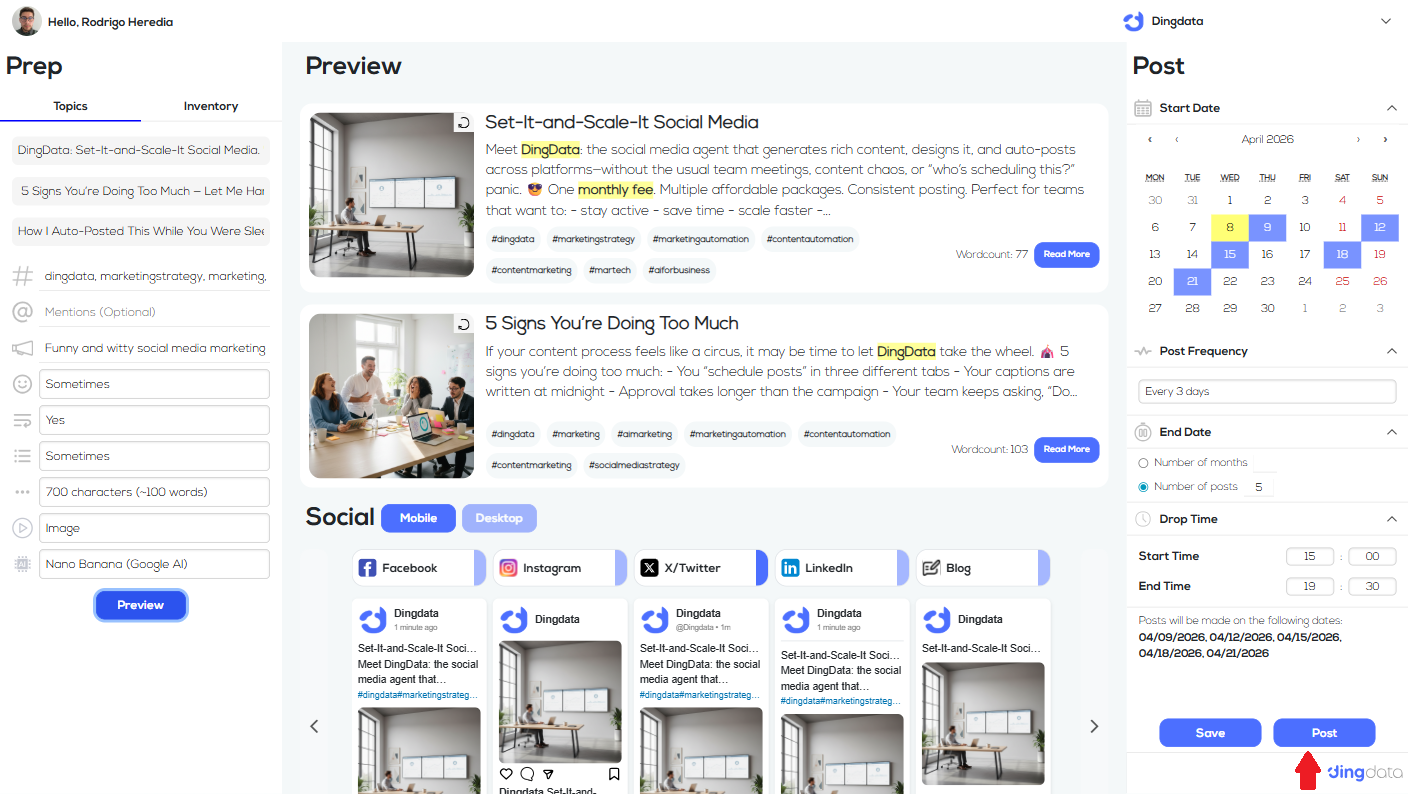
STEP 04Schedule
Plan your content strategy ahead of time. Use our intelligent scheduler to pick the best times for engagement.
- check_circleCustom Date Ranges
- check_circleFrequency Control
- check_circleSmart Time Slots
- check_circleMultiple Account Queues
STEP 05Begin Publishing
Everything is ready! With one click, your campaign goes live across all selected social platforms.
- check_circleReal-time Native Preview
- check_circleMulti-platform Sync
- check_circleInstant Posting
- check_circlePerformance Tracking
Ready to launch
your first campaign?
Access the full power of DingData and transform your social media management today.